Choppa Tools Choppa Tools

7 Tips to Change Brake Pads With Basic Hand Tools?

Time:2026-09-08 Author:Isabella
0%

Brake pads are small, but their job is not. They convert motion into heat, often during sudden stops, heavy traffic, and steep descents. Learning how to change brake pads with basic hand tools can reduce maintenance costs and improve your understanding of the braking system. It also demands restraint. A brake job is not a place for guesswork.

Industry guidance supports careful maintenance. The Federal Motor Carrier Safety Administration lists defective brakes among conditions that can place commercial vehicles out of service. NHTSA’s vehicle-safety resources also emphasize regular inspection, correct repairs, and attention to warning signs. These sources focus mainly on road safety, not home repairs, but their message applies clearly: braking components must work as designed.

This guide introduces seven practical tips for replacing pads with common tools, including a lug wrench, socket set, C-clamp, and properly rated jack stands. A torque wrench is strongly preferred. Never rely on a hydraulic jack alone. Check the rotor, caliper, slide pins, and brake-fluid level before reassembly. A worn rotor can make new pads perform poorly.

The process may look simple.

It is not always simple.

Even experienced owners can miss a seized slide pin or install a pad incorrectly. I still recheck pad movement, hardware placement, wheel torque, and pedal firmness before driving. That extra minute matters. If the caliper, hose, rotor, or bleeding process seems uncertain, a qualified technician should inspect the vehicle. The goal is not merely saving money. It is restoring predictable stopping performance with evidence, patience, and safe judgment.
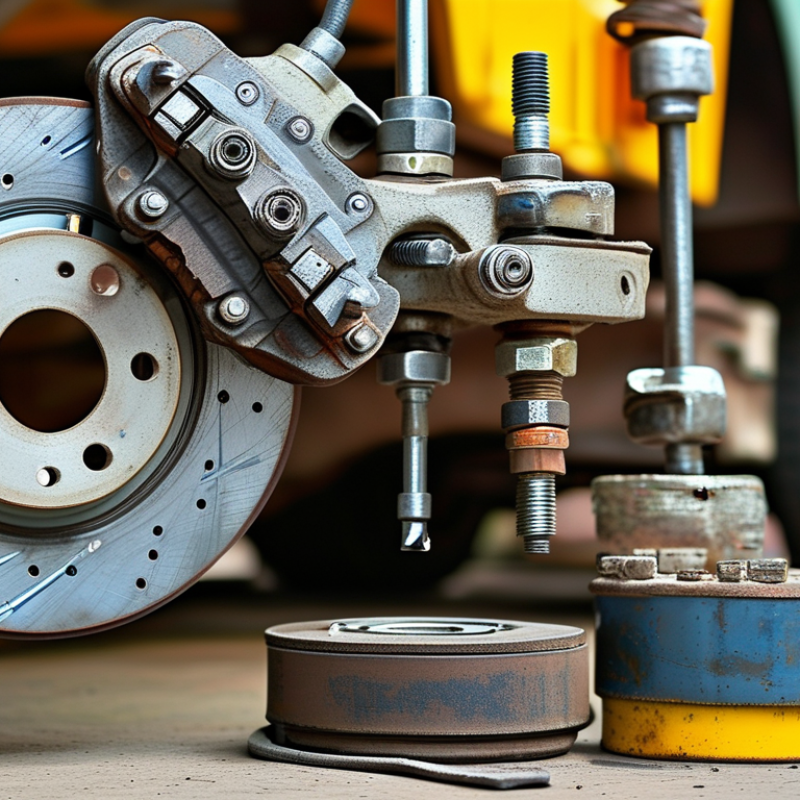
7 Tips to Change Brake Pads With Basic Hand Tools?

Brake Pad Replacement: Tools, Parts, and Safety Checks

Brake Pad Replacement: Tools, Parts, and Safety Checks

Changing brake pads with basic hand tools is possible, but preparation matters more than speed. You need a lug wrench, floor jack, jack stands, wheel chocks, socket set, torque wrench, C-clamp, brake cleaner, gloves, and eye protection. Use the correct pads, clips, shims, and guide-pin lubricant for your vehicle. Never support a vehicle with the jack alone.

Work on level ground. Engage the parking brake before lifting the opposite axle. After removing the wheel, inspect the rotor for deep grooves, blue heat marks, or a sharp outer lip. Check the brake hose for cracks and the caliper for fluid leaks. Measure rotor thickness when possible, then compare it with the vehicle service limit.

Federal Motor Vehicle Safety Standard No. 135 evaluates braking through measured performance tests, not appearance alone. That matters.

Push the caliper piston back slowly and watch the fluid reservoir. Do not let the caliper hang from its hose. Clean the bracket, install the new hardware, and tighten every fastener to the manufacturer’s torque specification. I still recheck each bolt. It is an easy step to overlook.

After assembly, press the pedal until it feels firm. The National Highway Traffic Safety Administration’s 2023 Traffic Safety Facts recorded 40,901 U.S. traffic deaths, so a soft pedal deserves immediate attention. Perform a cautious low-speed test, listen for scraping, and bed the pads according to their instructions. My own weak point is rushing the final inspection. Don’t copy that.

How to Lift and Secure the Vehicle Before Removing the Wheel

Before changing brake pads, choose a firm, level surface with good lighting. Keep the vehicle in Park, or select first gear in a manual transmission. Apply the parking brake firmly, then place wheel chocks behind the tires that remain on the ground. Small details matter.

Read the vehicle’s lifting points in its service manual. Do not guess from the bodywork. Position the floor jack beneath the approved point, then lift slowly until the tire clears the ground. Place two rated jack stands under solid support points, lower the vehicle gently, and leave the jack lightly touching as backup. Never work beneath a vehicle supported only by a jack. OSHA vehicle-repair guidance repeatedly stresses this control because hydraulic systems can lose pressure without warning. The UK Health and Safety Executive recorded 29 worker deaths involving workplace transport in 2023/24, showing how quickly vehicle movement becomes fatal. That figure is not a home-repair statistic, but the hazard is comparable.

Rock the vehicle carefully before removing the wheel. If it shifts, stop and reset everything. Remove the wheel only after the stands carry the load. Keep loose tools away from the lifting area, and never rely on stacked wood, bricks, or an improvised support. A torque wrench helps during reassembly, although many home mechanics skip it. I have done that too, and it is a mistake worth correcting. NHTSA tire-safety guidance also recommends checking stability, parking controls, and wheel security during roadside work. Take a photo of the setup before continuing. Safety becomes easier to verify when you can see it.

How to Remove the Caliper and Inspect the Brake Components

Changing brake pads with basic hand tools starts with safe preparation and a careful caliper inspection. Park on level ground, engage the parking brake, and loosen the wheel nuts slightly. Raise the vehicle with a proper jack, then support it with rated stands. Never rely on the jack alone. Remove the wheel and note the brake hose position. A quick photo can prevent confusion later.

Use the correct socket to remove the caliper guide-pin bolts. Some calipers use one sliding bolt and one pivoting bolt. Do not let the caliper hang from its flexible hose. Support it with a hook or strong wire. Slide the pads out and compare their thickness. Uneven wear may suggest seized guide pins, a sticking piston, or poor contact. Check the rotor for deep grooves, blue patches, cracks, and a sharp outer lip. Inspect rubber boots for tears and leakage.

Clean contact points with approved brake cleaner and avoid creating dust clouds. Check that the guide pins move smoothly, then lubricate only as specified for the vehicle. Compress the piston slowly while watching the fluid level. Replace damaged clips or boots. Refit the caliper and tighten fasteners to the specified torque. Pump the pedal until firm before driving. Test slowly in a safe area. Stop if the pedal feels soft, the vehicle pulls, or noise continues.

How to Install New Pads and Retract the Caliper Piston

Changing brake pads with basic hand tools is manageable when the vehicle is supported securely. Park on level ground, engage the parking brake, and place wheel chocks behind the tires. Loosen the wheel nuts before lifting the vehicle, then use approved jack stands. Remove the caliper bolts and support the caliper with wire. Never let it hang from the brake hose.

Slide out the old pads and inspect the rotor for deep grooves or heavy rust. To retract the caliper piston, place an old pad against it and use a C-clamp. Turn the clamp slowly and evenly. Watch the brake fluid reservoir because the level may rise. Some rear calipers require rotation, while electronic parking brakes need a service mode. Do not force a piston that refuses to move. That mistake can damage the caliper. Clean the pad contact points, but keep grease away from the friction surfaces.

Tips: Compare the new pads with the old ones before installation. Install the wear indicator in its original position. Tighten caliper fasteners to the vehicle manufacturer’s torque specification. I have found that rushing this step creates unnecessary noise later. After reassembly, press the brake pedal several times until it feels firm. Check the fluid level, refit the wheel, and lower the vehicle carefully. Perform a slow test in a safe area. The first stop may feel different. Recheck for leaks, uneven braking, or unusual sounds.

How to Reassemble, Test, and Bed In the New Brake Pads

Tip 1: Reassemble carefully after fitting the new pads. Clean the caliper bracket, then confirm each pad sits flat and moves freely. Apply approved lubricant only to the contact points, never the friction surface. Refit the retaining hardware and tighten every fastener to the vehicle manufacturer’s torque specification. I once rushed this check and found a pad sitting slightly crooked. Small mistakes can become serious braking problems.

Tip 2: Before moving the vehicle, pump the brake pedal several times. The pedal should become firm, not soft or sinking. Check the brake fluid level and inspect around the caliper for leaks. Reinstall the wheel, tighten the fasteners in a star pattern, and lower the vehicle securely. Perform a slow test in a safe, legal area. Stop immediately if the vehicle pulls, vibrates, or makes harsh noises.

Tip 3: Bed in the pads with controlled stops. Begin with several gentle applications from low speed, allowing the brakes to cool briefly between them. Follow with moderate stops without locking the wheels or holding the pedal at a standstill. Avoid emergency braking during this period. A noticeable smell can occur, but smoke, grinding, or a soft pedal needs professional inspection. My own testing was too cautious once, so I repeated the procedure gradually instead of guessing. Check the pedal and wheel area again after the final drive.

7 Tips to Change Brake Pads With Basic Hand Tools: How to Reassemble, Test, and Bed In the New Brake Pads
Tip Task Basic Tools and Materials Recommended Procedure Important Measurements or Limits Safety and Quality Check
1 Prepare the vehicle safely Wheel chocks, lug wrench, floor jack, jack stands, gloves, eye protection Park on a level surface, select Park or first gear, apply the parking brake, and loosen the wheel nuts slightly before lifting. Lift only at the vehicle's approved jacking point and support the vehicle with jack stands. Use the vehicle manufacturer's lifting points and the correct wheel-nut torque specification from the service information. Never work under a vehicle supported only by a floor jack. Keep the removed wheel beneath the reinforced side of the vehicle as an additional precaution.
2 Inspect the brake assembly before disassembly Flashlight, ruler or vernier caliper, camera or notepad Confirm whether the brake pad is fitted to the front or rear axle. Photograph the caliper, pad clips, wear indicator, and spring positions before removing anything. Check the rotor surface, caliper boot, brake hose, and visible leaks. Compare pad thickness, rotor thickness, and any discard limits with the vehicle service information. Do not use a rotor below its marked or specified minimum thickness. Replace or repair damaged hardware, cracked boots, leaking components, severely scored rotors, or pads contaminated with oil or grease before driving.
3 Remove the old brake pads Socket set, ratchet, combination wrenches, wire or hook Remove the caliper retaining bolts or guide-pin bolts as specified for the vehicle. Support the caliper with wire or a hook; do not let it hang from the flexible brake hose. Remove the old pads and note the position of each retaining clip. Guide pins should move smoothly and should not be bent, seized, or excessively loose. Replace damaged anti-rattle clips when required. Do not press the brake pedal while the pads or caliper are removed. Avoid breathing brake dust and do not use compressed air to clean it.
4 Retract the caliper piston correctly C-clamp or brake piston tool, old brake pad, brake-fluid container, rag Check the brake-fluid reservoir before pushing the piston back. Place the old pad against the piston and retract it slowly and evenly. Rear calipers with integrated parking brakes may require a tool that rotates and presses the piston rather than simply pushing it. Brake fluid should remain below the reservoir's maximum mark after the piston is retracted. Remove excess fluid only with a clean, compatible method if necessary. Do not force a piston that will not retract. A seized piston, damaged boot, or incorrect rear-piston procedure can cause brake drag or loss of braking performance.
5 Install the new pads and reassemble New pad hardware if supplied, brake-safe lubricant, wire brush, torque wrench Clean the pad-contact areas and install the clips in their original positions. Apply only a thin film of brake-safe lubricant to approved metal contact points; keep lubricant away from the friction material and rotor. Install the pads in the correct inner and outer positions, refit the caliper, and tighten fasteners to the specified torque. Use the exact caliper-bolt, guide-pin, bracket-bolt, and wheel-nut torque values for the vehicle. Torque values are not universal. Verify that the pads slide correctly in the bracket, the guide pins are lubricated only with compatible lubricant, and the brake hose is not twisted or stretched.
6 Test the pedal and check for safe operation Torque wrench, clean rag, flashlight Install the wheel, tighten the wheel nuts in a star pattern, lower the vehicle, and torque the wheel nuts. With the engine off, press the brake pedal slowly several times until it becomes firm and the pads contact the rotor. Check the fluid level and inspect for leaks. The pedal should become firm and should not continue sinking under steady pressure. The wheel should rotate without abnormal binding when the brake is released. Perform the first low-speed test in a clear area. Stop immediately if the pedal is soft, the vehicle pulls strongly, there is grinding, fluid leakage, or a warning light appears.
7 Bed in the new brake pads Clear road, traffic awareness, pad instructions Follow the pad manufacturer's bedding procedure when available. If no procedure is provided, a common controlled method is about 8–10 moderate stops from approximately 50 km/h to 15–20 km/h, allowing several hundred metres of cooling between stops. Avoid holding the pedal down at a complete stop immediately after repeated braking. Use moderate pressure rather than activating the anti-lock system. Afterward, drive for several minutes with minimal braking to allow the brakes to cool. A properly bedded system should provide consistent braking. Light odor or temporary surface discoloration can occur during bedding, but smoke, severe vibration, or persistent burning odor requires inspection.
General reminder: Brake designs and torque specifications vary by vehicle. Always follow the vehicle service information and the instructions supplied with the replacement pads. If any component is damaged, seized, contaminated, or outside its specified limit, have the braking system inspected before returning the vehicle to normal road use.

FAQS

: Where should the vehicle be lifted?

: Use a firm, level surface with good lighting. Follow the lifting points in the service manual. Never guess from the bodywork.

How can I secure the vehicle before removing a wheel?

Select Park or first gear. Apply the parking brake firmly. Place wheel chocks behind tires staying on the ground.

Are jack stands necessary?

Yes. Use two rated jack stands under solid support points. Never work beneath a vehicle supported only by a jack.

How can I check whether the vehicle is stable?

Rock it carefully before removing the wheel. If it shifts, stop and reset the setup. Loose tools should stay away from the lifting area.

What should I check when fitting new brake pads?

Clean the caliper bracket. Make sure each pad sits flat and moves freely. Use approved lubricant only on contact points, never friction surfaces.

How should the wheel and fasteners be reinstalled?

Tighten the fasteners in a star pattern. Use the specified torque whenever possible. I have skipped this check before. That was a mistake.

What should happen before driving?

Pump the brake pedal several times. It should become firm, not soft or sinking. Check the fluid level and inspect the caliper for leaks.

How should new pads be bedded in?

Start with gentle stops from low speed. Let the brakes cool briefly between applications. Then use moderate stops without locking the wheels.

When should I stop testing the vehicle?

Stop immediately if it pulls, vibrates, or makes harsh noises. Smoke, grinding, or a soft pedal needs professional inspection. Do not guess.

Conclusion

Learning how to change brake pads with basic hand tools starts with preparation, safety, and careful inspection. Gather the correct replacement pads, a jack, jack stands, lug wrench, socket set, brake cleaner, a suitable piston-retraction tool, and protective equipment. Park on a level surface, secure the vehicle, and lift it only at the approved points before supporting it firmly with jack stands. After removing the wheel, detach the caliper carefully without placing strain on the brake hose, then inspect the pads, rotor, hardware, and nearby components for uneven wear, damage, leaks, or corrosion.

Install the new pads in their proper positions and slowly retract the caliper piston as required, checking the fluid level and avoiding damage to seals. Refit the caliper and wheel, tighten all fasteners securely, and lower the vehicle safely. Before driving, press the brake pedal repeatedly until it feels firm, check for leaks or unusual movement, and perform a cautious low-speed test. Finally, bed in the pads with controlled stops, following the parts’ instructions and allowing them to cool between applications.

Isabella

Isabella

Isabella is a dedicated marketing professional with a sharp focus on driving brand growth and engagement through strategic content creation. With an extensive background in digital marketing, she combines her passion for storytelling with her keen understanding of industry trends to deliver......